Getting a Corgi Dry Through the Undercoat
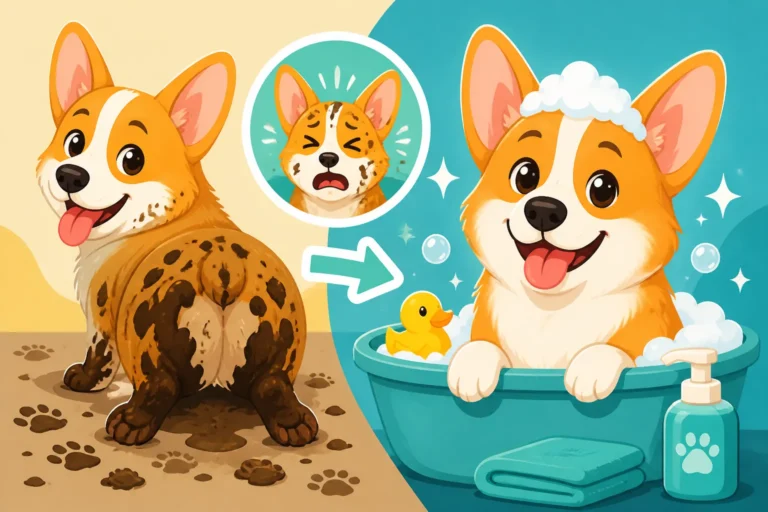
You've just given your adorable Corgi a much-needed bath, they're squeaky clean and smelling fresh, but now you're faced with the formidable task of getting them truly dry. That dense, water-loving undercoat can feel like trying to wring out a soaked wool blanket, and if you don't get it right, you're looking at a damp dog for hours, an enduring "wet dog" smell, and even potential skin issues. This comprehensive guide will walk you through the proper techniques and essential tools to efficiently and effectively dry your Corgi, ensuring their coat is perfectly fluffy and healthy, from the tips of their guard hairs right down to their skin.
Understanding Your Corgi's Incredible Double Coat
The Corgi's iconic plush appearance isn't just for looks; it's a marvel of canine engineering, designed for their original purpose of herding livestock in the often-damp Welsh climate. This unique construction is what makes them so resilient, but also why drying them thoroughly can feel like a Herculean task. Understanding the two distinct layers of their coat is the first step to conquering bath time.
The Inner Workings of the Corgi Coat
A Corgi's coat is what we call a "double coat," meaning it consists of two very different types of hair. First, there's the outer layer of coarser, longer "guard hairs." These hairs are somewhat water-repellent, designed to shed moisture and protect the dog from external elements like rain, mud, and brambles. They provide the Corgi with their distinctive color and texture.
Beneath this protective outer layer lies the real challenge: an incredibly dense, soft, and fluffy "undercoat." This undercoat is made up of fine, downy hairs that act as insulation, keeping your Corgi warm in cold weather and, surprisingly, helping to regulate their temperature in warmer climates by trapping a layer of air against their skin. When this undercoat gets wet, it holds onto moisture like a sponge, making it incredibly difficult to dry without the right approach. It’s a bit like trying to dry a dense wool sweater that’s been worn under a rain jacket – the outer layer might feel dry, but the inner core is still thoroughly soaked.
Why a Damp Undercoat Is More Than Just Annoying
For Corgi owners, the frustration of a seemingly dry dog that still feels cool and damp to the touch is all too real. You might think you've done a good job, only to get a whiff of that tell-tale "wet dog" smell hours later. But beyond the annoyance of a lingering odor, an incompletely dried undercoat poses several health risks for your beloved Corgi.
The dampness creates a warm, moist environment right against their skin, which is the perfect breeding ground for bacteria and fungi. This can quickly lead to painful skin infections, irritation, and a particularly nasty condition known as "hot spots." Hot spots are inflamed, raw, red lesions that can appear suddenly and spread rapidly, often caused by the dog licking or scratching at an itchy, damp area. Trust me, treating a hot spot is far more unpleasant and costly than taking the time to dry your Corgi properly. Nobody wants to see their Corgi miserable, picking at a red, weeping patch of skin. It’s why taking the time to get every layer dry is so important. Whether a Damp Corgi Undercoat Causes Trouble has more on this.
Essential Tools for Tackling the Undercoat
Drying a Corgi effectively isn't just about effort; it's about having the right equipment. Trying to dry that dense coat with just a regular towel and a prayer is a recipe for a damp, smelly dog and a frustrated owner. Investing in a few key tools will make the process infinitely easier, faster, and more effective, ensuring your Corgi is not just superficially dry but truly dry to the skin.
Towels, From Basic to Super Absorbent
While you might grab the nearest bath towel for your own shower, when it comes to a Corgi, not all towels are created equal. Regular cotton bath towels are okay for the initial soak-up, but their absorbency can quickly be overwhelmed by the sheer volume of water held by a Corgi's double coat. You'll likely go through several of them, and even then, they'll only get the surface moisture.
For superior water absorption, microfiber towels designed specifically for pets are a game-changer. These towels are made with tiny, dense fibers that can hold many times their weight in water, pulling moisture away from the fur more efficiently than cotton. The technique is also crucial: instead of rubbing vigorously, which can tangle the fur and create static, gently blot and squeeze the coat with the microfiber towel. Work in sections, pressing the towel firmly against the fur to draw out as much water as possible before moving on to the next step. Having a couple of large, high-quality microfiber towels on hand will drastically reduce the drying time later on.
The Power of the Pet Dryer
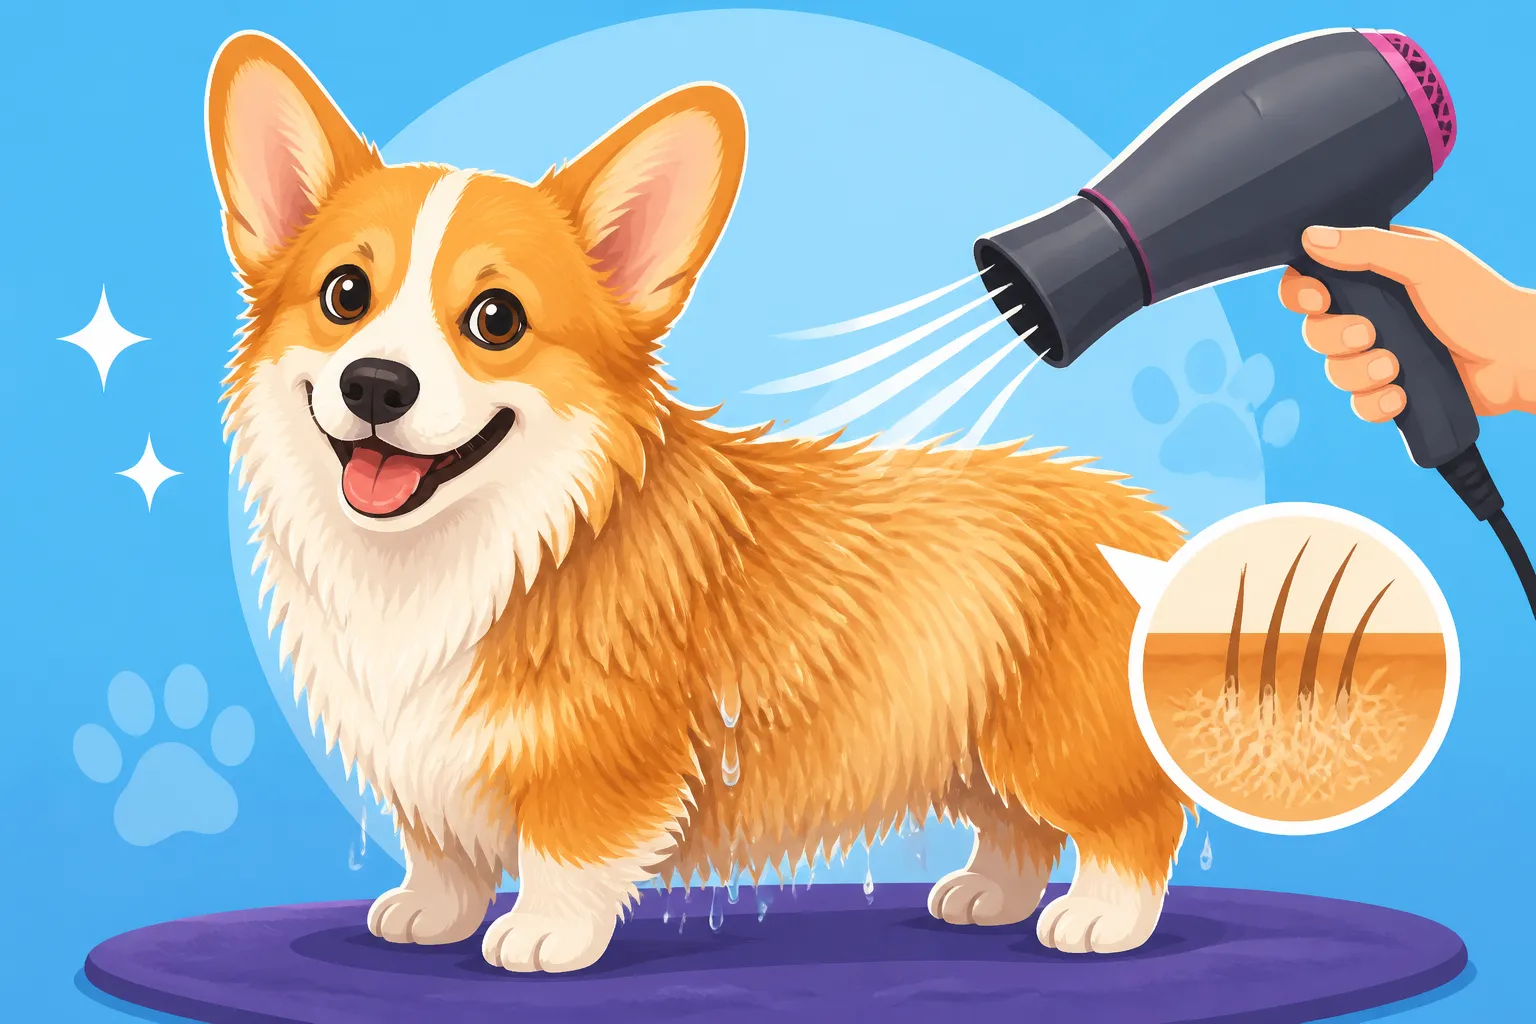
If you take one piece of advice from this guide, it's this: invest in a high-velocity force dryer made for pets. This is the single most effective tool for drying a Corgi's undercoat. These aren't like human hair dryers; they don't primarily use heat (though some have a low heat setting), but rather a powerful, concentrated stream of unheated or very lightly heated air. The force of the air literally blasts water out of the coat, separating the individual hairs and pushing moisture out from the skin level. This is critical for getting the undercoat truly dry.
You can find excellent professional-grade force dryers on platforms like Chewy or Amazon. Look for models with adjustable speeds and nozzle attachments. Forget about using your own human hair dryer – they rely on high heat, which can easily burn your dog's skin, and they lack the sheer force needed to penetrate that dense Corgi undercoat. Human hair dryers also don't have enough power to efficiently dry the dog, meaning you'll be blasting hot air at them for an extended period, which can be uncomfortable and potentially dangerous for your Corgi. The goal is force, not intense heat.
Brushes and Combs for Pre and Post-Drying
Effective drying isn't just about blowing air; it's also about preparing the coat and ensuring proper airflow throughout the process. That's where the right brushes come in. Before you even start with the dryer, a thorough brush-out is essential. Use a good quality slicker brush and an undercoat rake to remove as much loose, dead hair as possible. This is particularly important for Corgis, as they are prodigious shedders. The Rake and Comb a Corgi Coat Actually Needs is a great resource for selecting these tools.
Removing shed hair before and during the drying process allows the air to penetrate deeper into the coat, speeding up drying time and preventing mats from forming as the fur dries. Trying to dry a coat full of loose, tangled undercoat is like trying to dry a clump of wet cotton – it just won't work efficiently. The brushes also help distribute the air more evenly, ensuring that no damp spots are missed, which is a common oversight for Corgi owners.
| Tool Type | Purpose | Key Features | Why It's Essential for Corgis |
|---|---|---|---|
| Microfiber Towels | Initial water absorption, blotting | High absorbency, quick-drying, soft | Quickly removes surface moisture, reduces initial drying time, prevents matting from rubbing |
| High-Velocity Dryer | Forces water out of dense undercoat, separates hairs | Powerful airflow, adjustable speed, low/no heat, various nozzles | Penetrates deep into the double coat, preventing skin issues and "wet dog" smell |
| Slicker Brush | Removes loose hair, detangles | Fine, bent wire bristles, comfortable handle | Preps coat for drying, removes shed undercoat that traps moisture, aids airflow |
| Undercoat Rake | De-sheds dense undercoat | Longer, strong teeth, designed to reach undercoat | Critical for removing dead, insulating fur that prevents thorough drying and causes matting |
| Wide-Toothed Comb | Checks for tangles, ensures even dryness | Smooth, widely spaced teeth, durable material | Confirms the coat is tangle-free and dry down to the skin, even in tricky areas |
The Step-by-Step Drying Process for Maximum Effectiveness
Now that you've got your arsenal of tools ready, it's time to put them into action. Drying a Corgi isn't just about pointing a dryer at them; it's a systematic process that ensures every inch of that incredible double coat is thoroughly dry and healthy. Taking the time to follow these steps will save you headaches (and vet bills) down the line.
Pre-Drying Prep: The First Line of Defense
Before the dryer even comes out, you need to set your Corgi up for success. After their bath, give them a good shake (outside, if possible, to save your walls!), then immediately move to initial towel drying. Don't rub vigorously, as this can create tangles and static in their dense fur. Instead, use those super-absorbent microfiber towels to blot and squeeze the water out of their coat in sections. Press firmly, working your way around their body, paying extra attention to their chest, belly, and "trousers" – those fluffy areas on their hind legs that love to hold moisture. The more water you can remove with towels, the less time you'll spend with the noisy dryer.
Next, it's crucial to give your Corgi a thorough brush-out with your slicker brush and undercoat rake. Even if you brushed them before the bath, the shampoo and water will have loosened more dead hair, and removing it now will significantly aid the drying process. Imagine trying to dry a wet, matted mop versus a freshly brushed one – the airflow is completely different. This pre-drying brush helps separate the hairs, allowing the forced air to penetrate effectively. Also, set up your drying station in a safe, secure, and comfortable spot. A non-slip mat on a sturdy table or a grooming arm if you have one can be incredibly helpful to keep your Corgi in place and prevent back strain for you. Make sure the area is free of drafts but also well-ventilated.
Mastering the Force Dryer Technique
Now for the main event: the force dryer. Introduce the dryer slowly, especially if your Corgi is new to it or nervous. Start on the lowest setting, away from their face, and gradually increase the speed as they get comfortable. Offer treats and praise to create a positive association. Many Corgis find the sensation strange at first, but with patience and positive reinforcement, most will tolerate it, and some even come to enjoy the massage-like feeling.
The key to drying a Corgi with a force dryer is to work in small sections and direct the air against the grain of the fur. This lifts the coat, allowing the air to blast through the undercoat directly to the skin. Start at the hindquarters, as this area tends to stay wet longer. Hold the nozzle a few inches away from the coat, and use a sweeping motion to push the water out. As you dry each section, use your free hand (or a slicker brush) to continue separating the fur, helping the air flow. Be meticulous; lift the legs, dry the belly, get into the "armpits," and don't forget the tail. You'll literally see the water flying off their coat. For good quality, reliable pet dryers, a quick search on Amazon will show you many options, from handheld models to more powerful stand dryers, suitable for home use.
As you work, continuously check the skin for dryness. Part the fur and feel with your fingers – if it feels cool, it's still damp. Move the dryer constantly to prevent heat buildup on any one spot, even if your dryer has a low heat setting. The goal is to get their coat fluffy and light, with no damp clumps remaining.
Finishing Touches and Ensuring True Dryness
Once you've systematically worked your way over your entire Corgi with the force dryer, and you think they're dry, it's time for the final inspection. Give them another thorough brush-out with your slicker brush and then a wide-toothed comb. The comb is your ultimate detector for dampness and tangles. If the comb snags or feels resistant, that area is likely still damp or has a lingering mat. Go back over those spots with the force dryer until the comb glides smoothly through the fur, all the way down to the skin.
Pay particular attention to areas where fur is thickest or where moisture tends to hide: behind the ears, under the chin, in the "ruff" around their neck, and of course, those fluffy hindquarters. A perfectly dry Corgi coat should feel light, airy, and fluffy, not heavy or cool. Celebrate their patience (and your hard work!) with plenty of praise and a special treat. This positive reinforcement makes the next bath less of a battle. Consistent daily brushing helps maintain this dryness and coat health between baths, so consider Brushing a Corgi Daily Through a Shed as part of your routine.
Avoiding Common Drying Mistakes and Troubleshooting
Even with the best tools and intentions, drying a Corgi can present its challenges. Learning from common pitfalls and knowing how to troubleshoot is key to a smooth, successful grooming routine that benefits both you and your furry friend. Nobody gets it perfect on the first try, and that's okay!
The Dangers of Incomplete Drying
The most common mistake, and arguably the most detrimental, is not getting the undercoat completely dry. It’s easy to look at a Corgi and think, “Wow, they look dry!” when in reality, the dense undercoat is still holding moisture. This oversight can quickly lead to a host of problems. As discussed earlier, a damp undercoat creates a prime environment for skin issues. You might start noticing your Corgi scratching more than usual, or you might detect an unpleasant, yeasty odor coming from their fur, even days after a bath.
These aren't just minor inconveniences; they can escalate into painful skin infections, fungal growth, and particularly irritating hot spots. Hot spots, or acute moist dermatitis, can appear seemingly overnight. They are angry, red, weeping lesions that are intensely itchy and often require veterinary intervention, including antibiotics and topical treatments. Preventing them by ensuring complete dryness is far easier than treating them. Taking that extra 10-15 minutes to guarantee dryness right down to the skin can save you a lot of worry and expense. For more on this, check out Wet Patches That Turn Into Corgi Hot Spots.
Overheating and Skin Irritation
Another common, and serious, mistake is using too much heat or holding the dryer in one spot for too long. While pet dryers generally use lower heat than human dryers, prolonged exposure, especially on sensitive areas, can still cause discomfort, dry out the skin, or even lead to burns. Remember, your Corgi's skin is more delicate than yours, and their thick coat can trap heat.
Always keep the dryer nozzle moving, and periodically feel your Corgi's skin with your free hand to ensure it's not getting too warm. If you notice your Corgi panting excessively or trying to move away from the dryer in a distressed manner, immediately stop and check their temperature. Give them a break, offer some water, and try again when they've cooled down, perhaps using an even lower setting or no heat at all. The aim is to dry efficiently, not to cook them. This is why human hair dryers are such a bad idea – their concentrated, high heat is a recipe for disaster on a dog's sensitive skin.
Dealing with a Corgi Who Hates the Dryer
It's a common scenario: you have the perfect tools, the right technique, but your Corgi acts like the dryer is a monster. Loud noises and unfamiliar sensations can be frightening for some dogs. If your Corgi is resistant to the dryer, don't force it immediately. This could create a negative association that makes future grooming sessions even harder. Instead, start with gradual desensitization and positive reinforcement.
Begin by simply having the dryer in the room, off, while your Corgi gets treats. Then, turn it on low, far away, and continue with treats and praise. Slowly, over several days or weeks, bring the dryer closer and briefly direct the air towards their body, always pairing it with delicious rewards. Keep sessions short and positive. Some dogs respond better if you dry them in a small, enclosed space like a bathroom or a large crate, as it can feel more secure. If your Corgi remains extremely fearful or aggressive, consider consulting a professional groomer who has experience with nervous dogs. They can often get the job done efficiently and safely, and you can learn tips from their technique.
Beyond the Bath: General Coat Care for a Healthy Undercoat
While getting your Corgi thoroughly dry after a bath is crucial, proper coat care extends far beyond just that one event. A healthy, well-maintained coat is easier to wash, easier to dry, sheds less (relatively speaking, for a Corgi!), and contributes significantly to your dog's overall well-being. Thinking about the big picture of coat health will make grooming a more manageable and pleasant experience for everyone.
Regular Brushing: The Foundation of Good Coat Health
For a Corgi, regular brushing is not optional; it's absolutely fundamental. Their double coat is designed to shed, and boy, do they shed! If you don't stay on top of it, that dead undercoat accumulates, trapping moisture, forming mats, and making drying after a bath incredibly difficult. Daily brushing, or at least every other day, with a slicker brush and an undercoat rake is essential. This routine removes loose hair, prevents tangles, distributes natural oils, and promotes air circulation to the skin.
Think of it this way: a well-brushed coat allows air and water to move more freely. When you go to bathe your Corgi, the water can penetrate more easily, and when you dry them, the force dryer can blast through the individual hairs more effectively. This proactive approach saves you significant time and effort during bath time, and it drastically reduces the amount of Corgi glitter you find around your home. You'd be amazed at How Much Hair a Twenty-Eight Pound Corgi Drops – regular brushing manages this onslaught.
Choosing the Right Shampoo and Conditioner
The products you use in the bath also play a role in how well your Corgi's coat responds to drying. While any dog shampoo will get them clean, choosing one appropriate for their double coat and skin type can make a difference. Look for shampoos specifically formulated for double-coated breeds, or those designed for de-shedding, which can help loosen dead undercoat during the bath, making it easier to remove during brushing and drying. If your Corgi has sensitive skin, opt for a hypoallergenic or oatmeal-based formula.
When shampooing, really work the product down to the skin, gently massaging to loosen dirt and dead hair. The rinsing step is even more critical for a Corgi than for many other breeds. Residue from shampoo or conditioner, if left in the dense undercoat, can cause skin irritation, itching, and contribute to that "damp dog" smell. Rinse, rinse, and rinse again until the water running off your Corgi is completely clear and their fur feels squeaky clean, not slick or soapy. You can often find a good selection of specialized shampoos and conditioners on Chewy, making it easy to pick one that suits your Corgi's specific needs. For advice on getting the initial rinse right, check out Getting Water Through to a Corgi's Skin. If you're wondering which specific products to look for, Shampoo That Suits a Thick Corgi Undercoat can provide some excellent guidance.
Dietary Impact on Coat Health
While diet doesn't directly help you dry your Corgi after a bath, it profoundly impacts the overall health and condition of their coat and skin. A healthy coat, nourished from within, is generally stronger, sheds less excessively, and is often easier to manage during grooming. If your Corgi's coat seems dull, brittle, or their skin is flaky, it might be a sign that their diet isn't providing all the nutrients they need.
High-quality dog food that lists real meat as the first ingredient and contains essential fatty acids like Omega-3 and Omega-6 can work wonders for coat health. These fatty acids contribute to a shiny coat and healthy skin, reducing dryness and irritation. Some owners also opt for fish oil supplements to further boost these beneficial fats. While a good diet won't magically make your Corgi dry themselves, it creates a foundation for a resilient, manageable coat that will be less prone to matting and skin issues, making your grooming efforts much more effective in the long run.
Disclaimer
This article is for general informational purposes only and does not constitute professional advice. Laws, prices and regulations vary by location and change over time. Consult a qualified professional for guidance on your specific situation.