Getting Water Through to a Corgi’s Skin
One of the most frustrating parts of owning a Corgi, besides the constant shedding and their uncanny ability to get into mischief, is trying to give them a thorough bath. Their incredibly dense double coat seems designed to repel water, leaving you struggling to get the shampoo right down to their skin where it needs to be. This guide is all about tackling that exact problem, sharing veteran tips and tricks to ensure your Corgi gets properly soaked and cleaned, from the tip of their nose to the root of their tail, without unnecessary stress for either of you.
The Unique Challenge of a Corgi's Double Coat
Before we dive into the nitty-gritty of bath time techniques, it's really helpful to understand why getting your Corgi thoroughly wet feels like trying to wash a waterproof sheep. It's not just your imagination; their coat truly is a marvel of natural engineering, built for function over easy grooming.
Understanding the Corgi's Double Coat Architecture
Imagine your Corgi's coat not as one layer of fur, but two distinct, incredibly effective layers working in tandem. The outer layer consists of what we call "guard hairs." These are tougher, coarser, and often slightly longer hairs that are designed to be weather-resistant. They shed water, repel dirt, and protect your Corgi from external elements, almost like a natural raincoat. These guard hairs are the first line of defense against the elements.
Beneath this protective outer shell lies the true challenge: the undercoat. This layer is dense, soft, and incredibly thick, almost like a woolly blanket. Its primary purpose is insulation, keeping your Corgi warm in cold weather and, surprisingly, helping to regulate their body temperature in warmer climates by trapping air. When you try to bathe your Corgi, the guard hairs wick away the water, and any water that does get through then gets caught in the dense, fluffy undercoat. It's like pouring water onto a sponge that's already encased in a plastic bag – it just sits on top, or struggles to penetrate fully. This is also why Corgis are such prolific shedders; that undercoat replaces itself constantly. You'll definitely notice How Much Hair a Twenty-Eight Pound Corgi Drops when you brush them regularly.
The Natural Repellent Qualities of Corgi Fur
Beyond the physical structure, Corgi fur also possesses natural oils that further enhance its water-repellent qualities. These oils, secreted by glands in the skin, help to keep the coat healthy, shiny, and provide an additional barrier against moisture. While these oils are fantastic for your Corgi's natural protection, they certainly don't make bath time any easier.
When dirt, grime, and environmental debris accumulate in the coat, these natural barriers become even more effective at preventing water penetration. This means that a Corgi who's been playing outside, rolling in who-knows-what, or hasn't been thoroughly brushed in a while will be even harder to get truly wet. The water beads up and rolls off, leaving you feeling like you're chasing droplets around their fur instead of getting a good, deep clean. It's a testament to their heritage as working dogs, designed to be out in all weathers, but it sure makes our lives as Corgi parents a bit more challenging when it comes to bath day!
Essential Tools and Techniques for a Deep Soak
Conquering the Corgi bath isn't about brute force; it's about smart tools and even smarter techniques. With the right approach, you can transform a frustrating chore into an efficient, even enjoyable, routine.
The Critical Role of Pre-Bath Brushing and Deshedding
I cannot stress this enough: do not skip the pre-bath brush. This step is absolutely foundational to getting water through your Corgi's dense coat. Think of it like preparing a tangled mess of yarn before you try to dye it; you need to untangle and separate the fibers first.
Before a single drop of water touches your Corgi, you need to dedicate at least 15-30 minutes, sometimes more, to a thorough brushing session. Your goal here is to remove as much loose, dead undercoat as possible. This dead hair, especially during peak shedding seasons, can form a thick, felt-like layer that acts as an impenetrable barrier to water and shampoo. By removing it, you're literally opening up pathways for the water to reach the skin.
Tools are key here. A good undercoat rake or a deshedding tool is your best friend. For instance, there are many effective options available on sites like Chewy or Amazon. Work in sections, starting from the hindquarters and moving forward. Brush against the grain of the fur initially to lift and loosen the undercoat, then with the grain to pull out the shed hairs. Pay particular attention to the "trousers" on their hind legs, their chest, and around their neck, as these areas often have the densest undercoat. If you're wondering The Rake and Comb a Corgi Coat Actually Needs, look for tools with sturdy, rounded teeth that can penetrate the topcoat without scratching the skin. Daily brushing, not just before baths, can also make a huge difference in managing their coat year-round.
Mastering the Art of Proper Wetting Methods
Once your Corgi is thoroughly brushed, you're ready for water. The trick here is patience and strategic application.
First, ensure the water temperature is comfortably lukewarm – not too hot, not too cold. Start by wetting their feet and gradually move upwards. This allows them to adjust to the sensation.
Now, for the actual wetting:
- Dilute Your Shampoo: This is a game-changer. Corgi shampoo, especially concentrated formulas, won't penetrate if applied straight to dry fur. Mix a small amount of shampoo with water in a separate pitcher or an applicator bottle. This creates a solution that can more easily spread and work its way through the dense coat.
- Use a Sprayer Attachment: If you have one, a hose attachment on your tub or a removable showerhead is incredibly helpful. The focused stream of water can push through the guard hairs and undercoat much more effectively than just pouring water from a cup. Aim the nozzle directly at the skin, parting the fur with your fingers as you go.
- Work in Sections: Don't try to wet the whole dog at once. Focus on one small area at a time, saturating it thoroughly before moving to the next. Start with the legs and belly, then move to the back and chest. Save the head and face for last, using a gentle hand and perhaps a washcloth to avoid getting water in their ears or eyes.
- Massage, Massage, Massage: As you apply the diluted shampoo, really work it into the coat with your fingers, right down to the skin. You should feel the skin getting wet, not just the top layers of fur. This massage not only helps the shampoo penetrate but also feels good to your Corgi, making bath time a more positive experience.
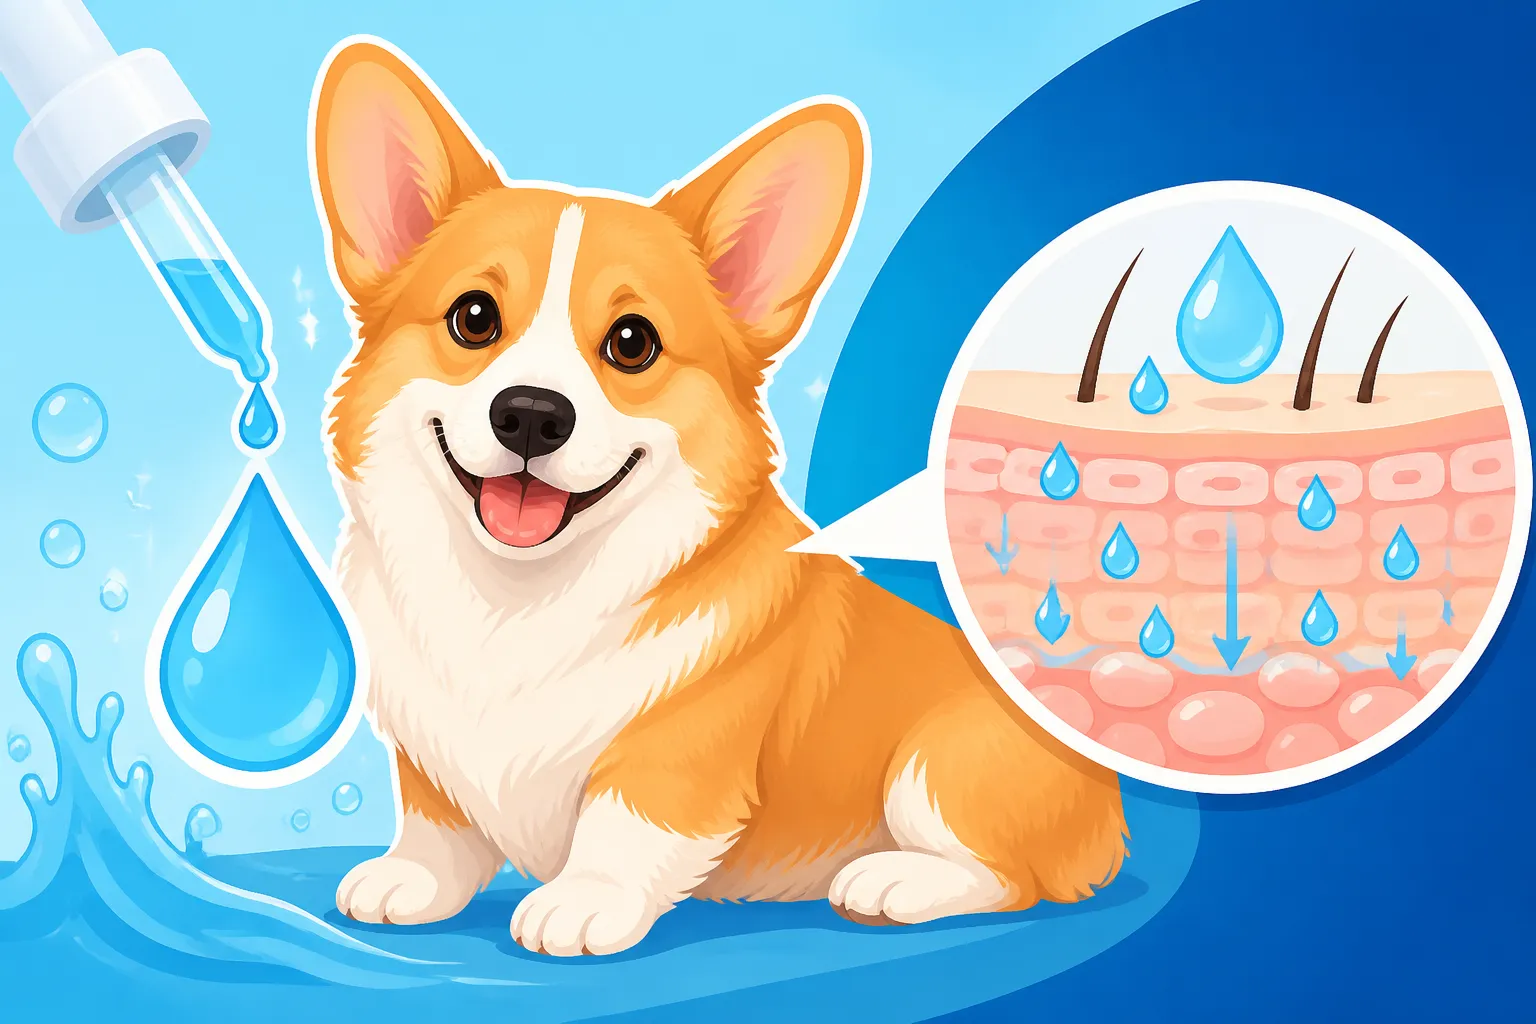
Remember, the goal isn't just to get the fur wet; it's to get the skin saturated. This deep wetting is what allows the shampoo to do its job, cleaning away dirt and oils from the source. When it comes to finding Shampoo That Suits a Thick Corgi Undercoat, look for formulas designed for double coats, often available from reputable pet supply retailers.
The Art of Rinsing and Drying a Corgi Properly
Getting your Corgi wet is only half the battle; rinsing and drying them correctly are just as crucial for their coat health and comfort. Cutting corners here can lead to skin irritation and a host of other issues.
Ensuring a Complete Rinse: Don't Leave a Trace
If you thought getting water in was hard, wait until you try getting all the shampoo out! Leaving shampoo residue in your Corgi's dense undercoat is a recipe for disaster. That sticky, irritating residue can lead to dry, flaky skin, itching, and even dreaded hot spots. It can also make their coat feel greasy and dull, attracting dirt more quickly.
The key to a thorough rinse is patience and vigilance. You need to rinse your Corgi for much longer than you might think necessary. Just when you think the water is running clear, rinse for another five minutes. Seriously.
Here's how to ensure a complete rinse:
- Use Your Sprayer Again: That shower attachment or hose sprayer is your best friend for rinsing, just as it was for wetting. The focused stream helps to flush out shampoo from the undercoat.
- Feel for Slipperiness: Run your hands over your Corgi's coat, especially the dense areas like their back, sides, and belly. If you still feel any slipperiness or residue, keep rinsing. The fur should feel clean, not slick.
- Work Against the Grain: Gently push the fur against its natural lay while rinsing to help expose the skin and ensure water penetrates all the way through.
- Pay Attention to Hidden Spots: Don't forget the armpits, groin area, and under the tail. These areas are prone to trapping shampoo and are often overlooked.
- Visual Check: Watch the water running off your Corgi. It should be completely clear, without any suds or cloudiness, especially when you gently squeeze the fur.
A good, long rinse prevents skin issues and ensures your Corgi's coat is truly clean.
Drying to Prevent Skin Issues: More Than Just Toweling Off
Improper drying, especially not getting the undercoat fully dry, can be just as problematic as not rinsing properly. A damp undercoat creates a warm, moist environment perfect for bacteria and fungi to thrive, leading to skin infections, odors, and, yes, those miserable hot spots. This is exactly Whether a Damp Corgi Undercoat Causes Trouble – and the answer is a resounding yes!
- Initial Towel Drying: After rinsing, give your Corgi a good shake (outside the tub, if possible!). Then, use several absorbent towels to blot and squeeze as much water out of their coat as you can. Avoid vigorous rubbing, which can tangle the fur and potentially irritate the skin. Just gently press and squeeze.
- The High-Velocity Dryer is Your MVP: For a Corgi, a high-velocity dog dryer is not a luxury; it's practically a necessity. These powerful blowers are designed to push water out of the coat rather than just blowing hot air over it. They are incredibly efficient at penetrating the dense undercoat. You can find excellent options on online marketplaces like Amazon, or specialty pet stores.
- Temperature Settings: Always use a cool or low-heat setting. Excessive heat can burn your Corgi's skin or damage their coat.
- Technique: Start by directing the nozzle close to the skin, lifting the fur as you go. Work in sections, much like you did with wetting. The goal is to dry the undercoat first, then the topcoat. As the fur dries, you'll see it fluff up, and you can use a brush simultaneously to help separate the hairs and ensure thorough drying.
- Checking for Dampness: Continually run your fingers deep into their coat to check for any dampness. Pay extra attention to the chest, belly, and base of the tail.
- Air Drying is Risky: While it might seem easier, simply air-drying a Corgi, especially indoors, is generally not recommended. Their undercoat can take hours, even a full day, to dry completely, and the prolonged dampness significantly increases the risk of skin problems. If you absolutely must air dry, ensure they are in a warm, dry, well-ventilated area and continue to monitor their skin.
A properly dried Corgi should feel light, fluffy, and completely dry to the touch, right down to their skin. This might take some time, but it's an essential step for their health and comfort. For more specific advice on drying, you might find articles like Getting a Corgi Dry Through the Undercoat helpful.
Addressing Common Bath Time Frustrations
Even with the best tools and techniques, bath time can sometimes feel like a wrestling match. Corgis, with their independent and sometimes stubborn nature, can present unique challenges during grooming. Let's tackle some of these head-on.
Dealing with a Corgi's Reluctance to Bath
It’s completely normal for some Corgis to be less than thrilled about bath time. The noise of the water, the slippery surface, the unfamiliar sensation – it can all be overwhelming. But with patience and positive reinforcement, you can help them overcome their apprehension.
- Start Early and Make it Positive: If you have a puppy, introduce them to the tub and water gradually. Use lots of praise, gentle petting, and high-value treats. Make every step of the process associated with something good. Even for adult Corgis, a positive association can be built over time.
- Non-Slip Surfaces are a Must: A slippery tub is terrifying for a dog, especially a Corgi with their short legs and long back. Always use a non-slip bath mat in the tub. This gives them confidence and prevents anxiety-inducing slips.
- Gradual Introduction: Don't just plop them in a tub full of water. Start with an empty tub, let them sniff around, give treats. Then introduce a little warm water. Slowly progress to wetting their feet, then their legs, all while remaining calm and reassuring.
- Lick Mats and Distractions: A suction-cup lick mat smeared with peanut butter (xylitol-free!) or plain yogurt can be an absolute lifesaver. It keeps them focused on a positive, tasty distraction, making them much less aware of the bathing process.
- Enlist Help: If your Corgi is particularly uncooperative, having a second person to gently hold, reassure, and offer treats can make a huge difference. Sometimes, two sets of hands are just what you need to make bath time efficient and less stressful.
Remember, patience is key. Rushing or forcing your Corgi will only make them more resistant in the future.
Managing the Mess and Preventing Slips
Let's be honest, bathing a Corgi can feel like a small-scale flood in your bathroom. Their short stature and dense fur mean water, shampoo, and fur can end up everywhere. A little preparation goes a long way.
- Designate a Bath Area: Whether it's your main bathroom, a utility sink, or a dedicated grooming tub, try to keep the mess contained. Have all your supplies (shampoo, towels, brushes, dryer) within easy reach before you start.
- Protect Yourself and Your Space: Wear old clothes or a waterproof apron. Lay down old towels on the floor around the tub to absorb splashes and catch stray fur.
- Non-Slip Mats, Everywhere: We already covered the tub mat for your Corgi's safety. Consider non-slip mats or runners on the bathroom floor as well, both for your safety and to prevent your Corgi from slipping once they jump out, especially if they're prone to zoomies post-bath.
- Grooming Tubs: If you bathe your Corgi frequently or have back issues yourself, investing in a raised grooming tub can be a game-changer. These tubs raise your dog to a comfortable working height, reducing strain on your back and keeping the mess contained.
When to Seek Professional Grooming Help
While home bathing is totally achievable for most Corgi owners, there are times when calling in the pros is absolutely the right choice. No shame in it!
- Overwhelmed by Shedding or Matting: If your Corgi has a particularly thick undercoat shed that you just can't get on top of, or if they've developed mats, a professional groomer has the tools and expertise to handle it safely and effectively. They can perform a thorough deshedding treatment that might be beyond your home capabilities.
- Skin Conditions or Medicated Baths: If your Corgi has a skin condition that requires special medicated shampoos, a professional groomer can ensure these are applied correctly and thoroughly, which is vital for treatment success.
- Anxiety or Aggression: If bath time becomes a truly traumatic experience for your Corgi, or if they become anxious or aggressive, a professional groomer is often better equipped to handle them. They have specialized facilities, training in dog behavior, and safety measures in place to make the experience as calm as possible.
- Lack of Time or Equipment: Let's face it, life gets busy. If you simply don't have the time, space, or the right high-velocity dryer, a groomer can provide that much-needed deep clean and dry. They often have hydraulic tubs and powerful dryers that get the job done efficiently. For an idea of costs, you might want to look into What a Groomer Charges to Blow Out a Corgi in your area.
Here's a quick comparison of common wetting tools and their effectiveness:
| Wetting Tool | Pros | Cons | Ideal For |
|---|---|---|---|
| Cup/Pitcher | Readily available, gentle stream | Limited pressure, difficult to penetrate dense undercoat, slow | Spot cleaning, very fearful dogs, wetting delicate areas like the face |
| Removable Showerhead | Better pressure than a cup, easy to direct | Can still struggle with very dense fur, requires consistent effort | General home bathing, good for larger areas, easier rinsing |
| Hose Sprayer/Nozzle | High pressure, excellent for penetrating undercoat, efficient | Can be startling for some dogs, requires a good tub attachment | Thorough wetting of the body, fast and effective deep cleaning |
| Diluted Shampoo | Helps spread product evenly, aids penetration, prevents residue | Requires pre-mixing, adds a step to the process | Any Corgi bath, essential for thick coats to ensure even application |
Ultimately, bathing your Corgi doesn't have to be a dreaded event. With the right preparation, tools, and a healthy dose of patience, you can ensure your furry friend is clean, comfortable, and healthy, from their skin out.
Disclaimer
This article is for general informational purposes only and does not constitute professional advice. Laws, prices and regulations vary by location and change over time. Consult a qualified professional for guidance on your specific situation.